
Need a place to work on campus?
The Workstation Hoteling System allows Montclair State University faculty and staff to reserve a temporary desk or workstation on the main campus. This option is ideal for those who primarily work remotely, do not have a permanent office, or are visiting from Bloomfield College for the day.
With just a few clicks, you can reserve a workstation in advance, receive a confirmation, and check in on-site using a QR code at your assigned desk.
Ready to get started?
Use the button below and log into your NEST account to access the reservation page and secure your workstation.
Instructions – Hoteling Workspace
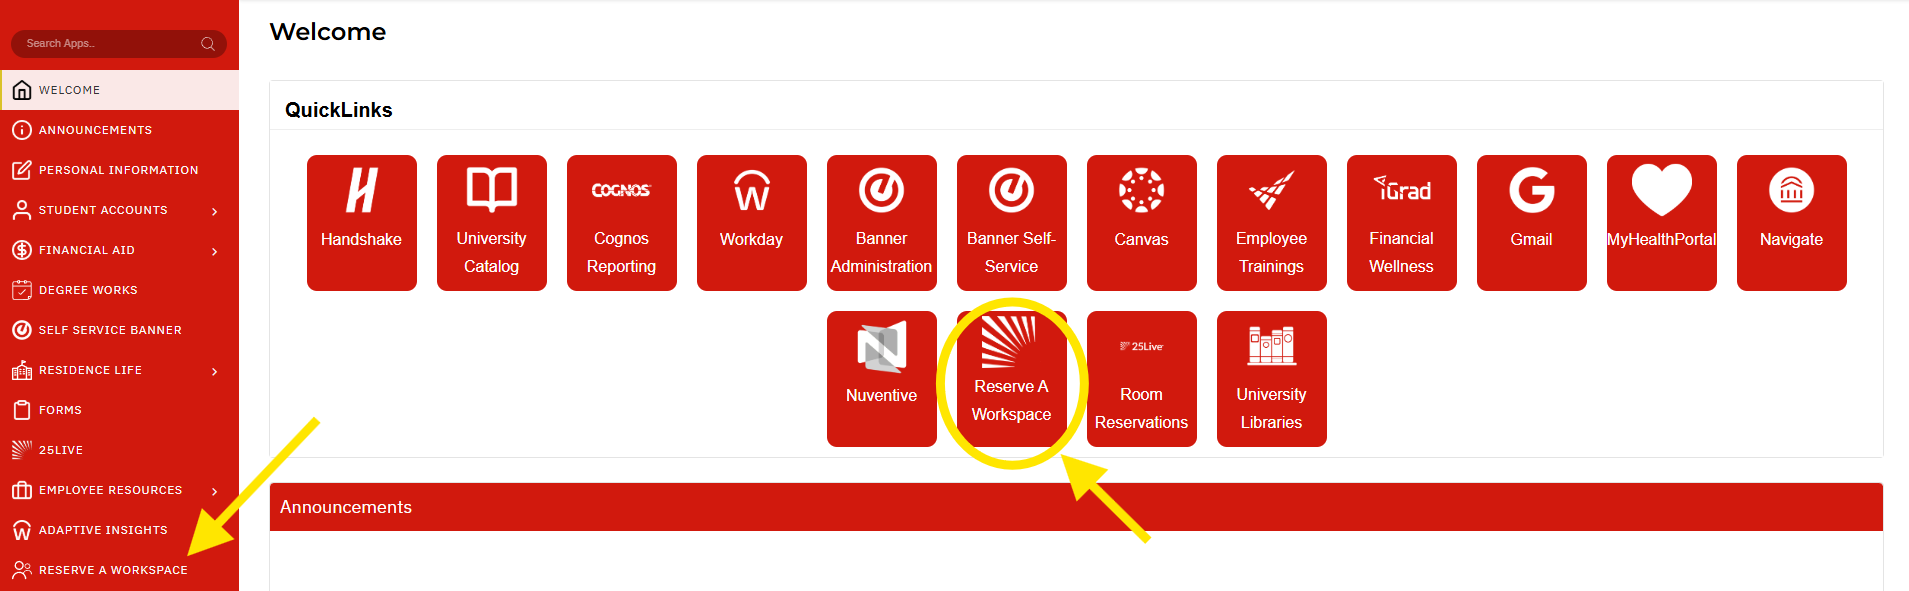
Step 1: Log into NEST and Navigate to the NEST Dashboard Sidebar Menu or Tile Menu
Use your University NetID and password to log in and select one of the Reserve a Workspace links.
**Note: Clicking on images on this page will make them larger
Step 2: Reserve Your Workstation
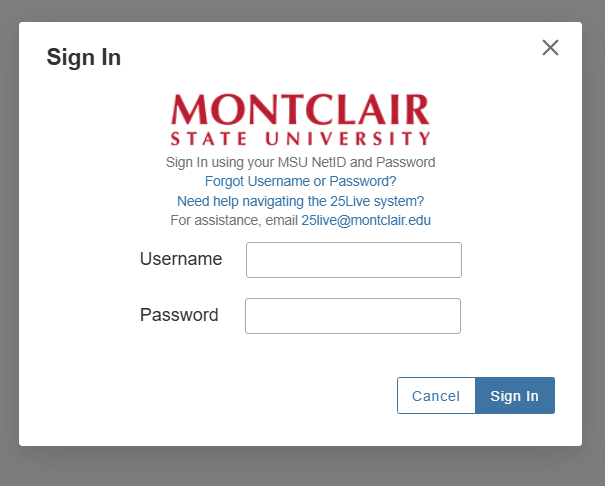
Log into your 25Live account using your NEST credentials (username and password) in the widget at top right of the page.
![]()
After logging in fill out the resulting fields: Date/Time, Start time, End time, Express Locations (Search spaces) – a dropdown menu will appear to allow you to select from a list of Workstations, and Event Name – a textbox where you will enter your full name. You can only create one reservation a day for a max of 9 hours.
![]()
After all the fields are filled out, click the Save button at the bottom.
Shortly after saving your reservation, you should receive a confirmation email. Keep this confirmation handy – your Event Reference Number from this email is required for the check-in process.
![]()
Step 3: Check In When You Arrive
When you are ready to check in, locate the workstation that you have reserved and find the posted QR code that corresponds to your specific workstation. Each workstation has a unique QR code specific to it (e.g., COLE 144.01, COLE 144.02, etc.).
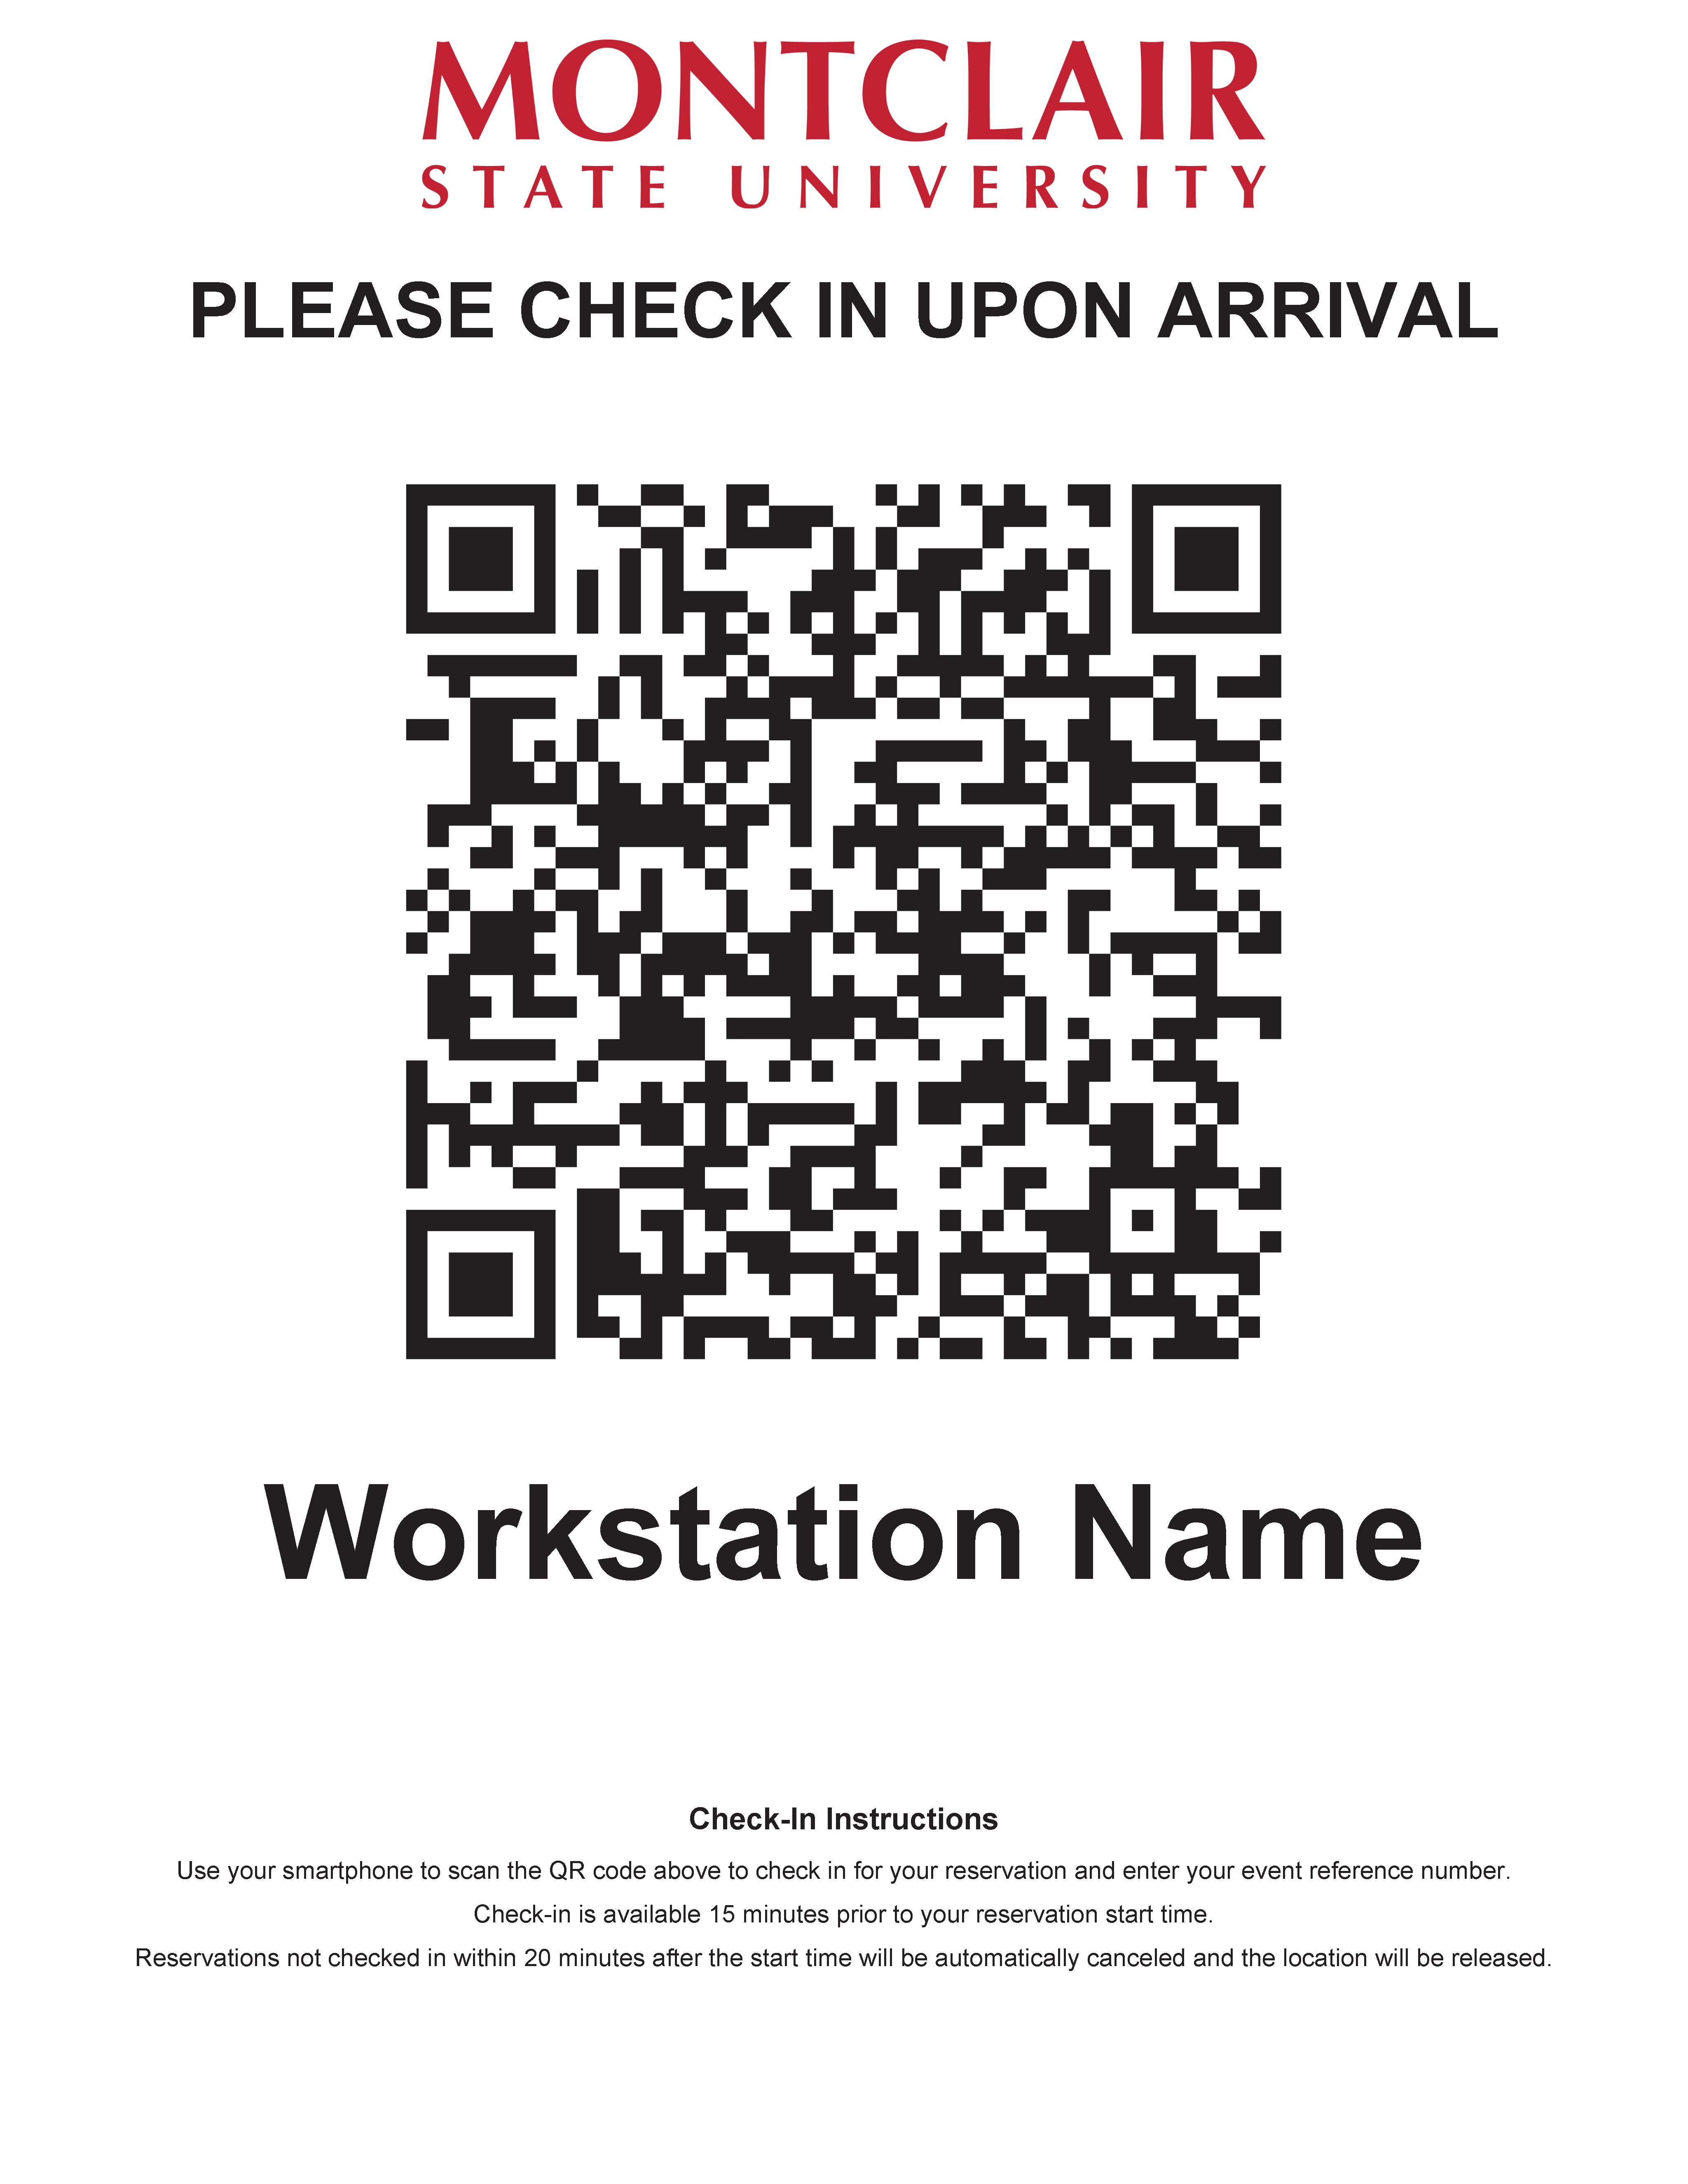
Scan the QR code displayed at your workstation using your mobile device’s camera or a QR scanner app. The QR code will open up a mobile-friendly check-in page in your devices default web browser.
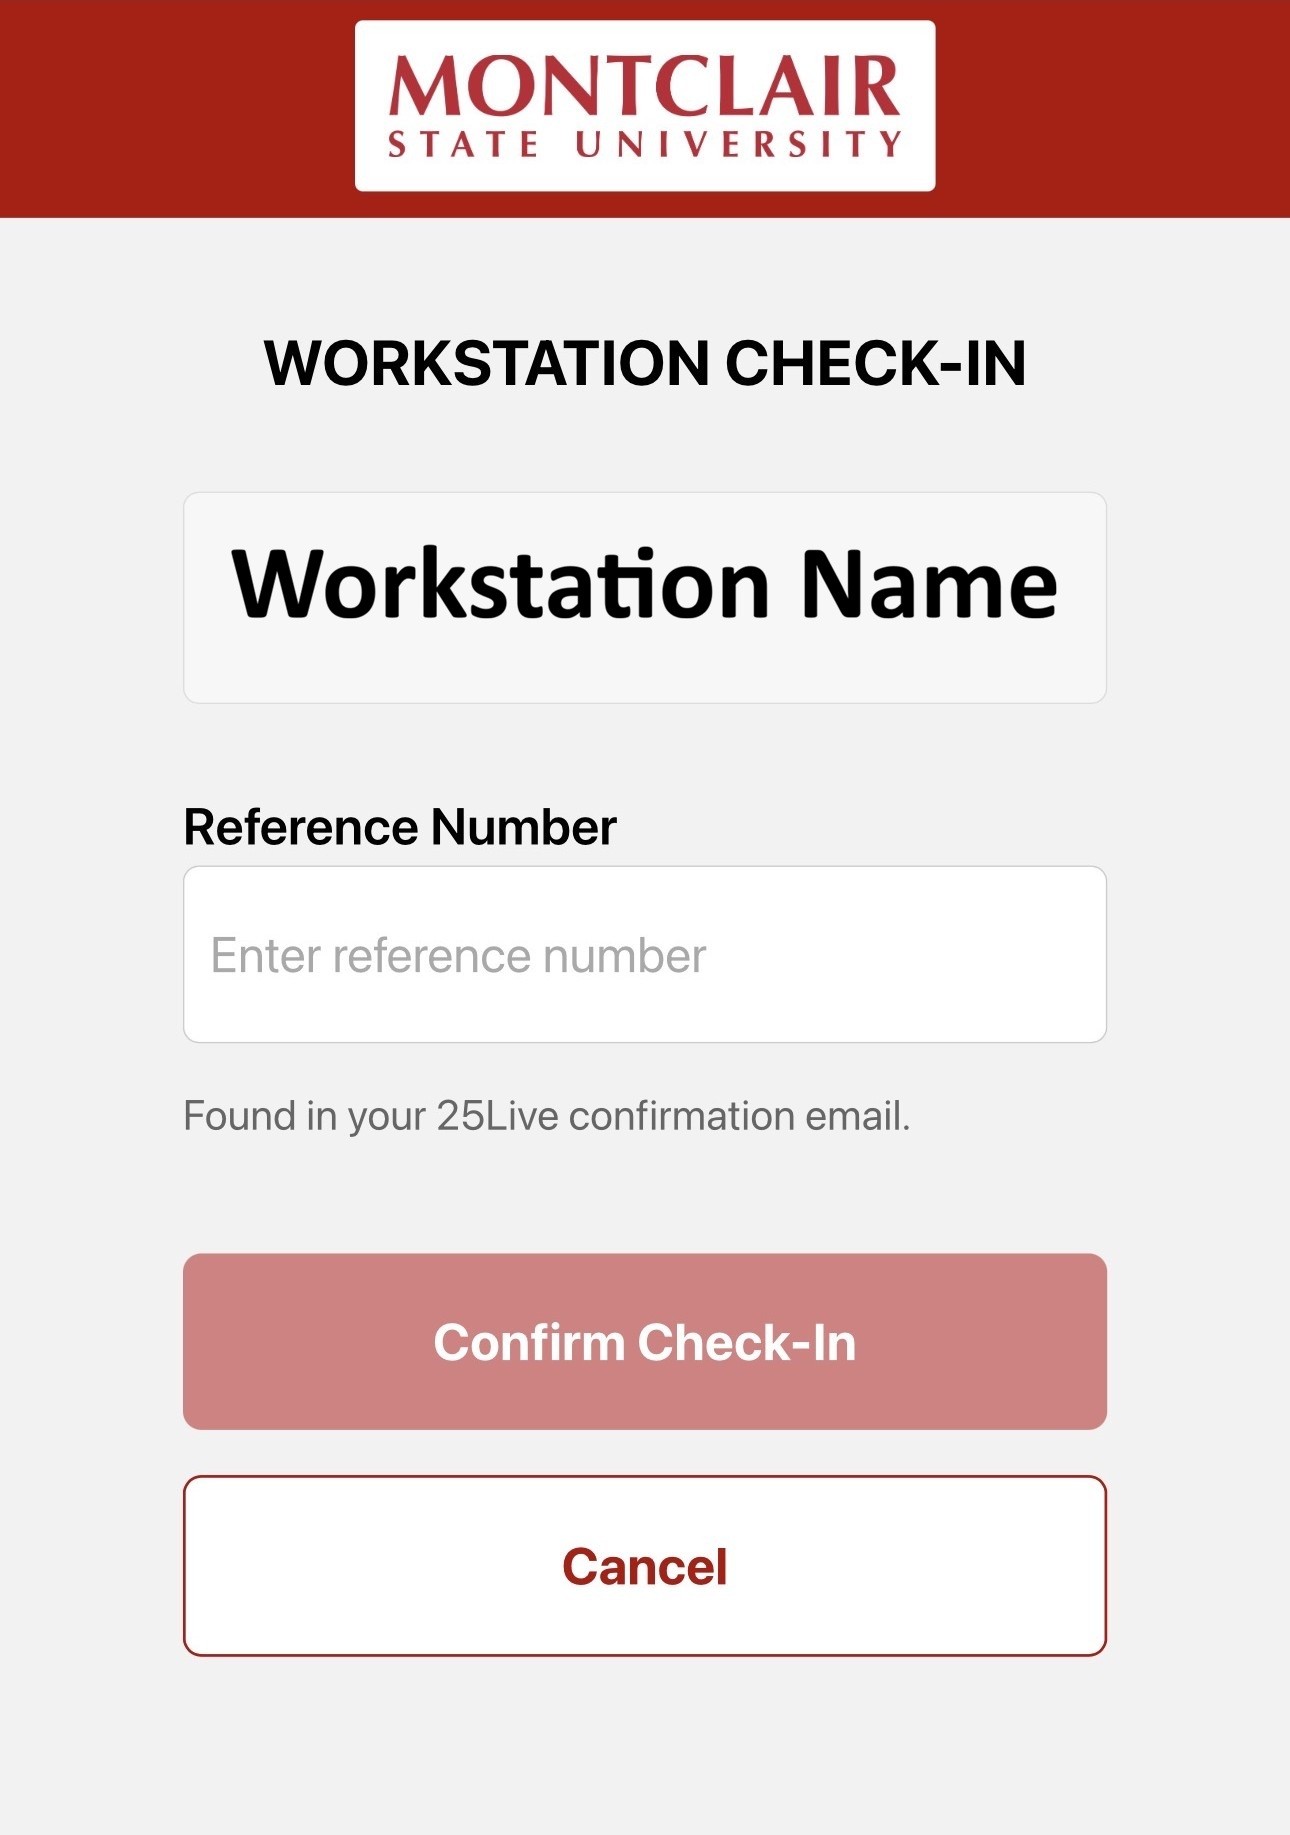
On this check-in page:
- Verify that the correct station name is displayed.
- Enter your Event Reference Number in the provided field.
- Tap Confirm to check in
You will see a confirmation message once your reservation is successfully recorded.
If something looks wrong:
If you scanned the wrong station’s QR code or mistyped your Event Reference Number, just tap Cancel, scan the correct code and try again.
Note: You may check in starting 15 minutes before your reservation start time and up to 20 minutes after. If you do not check in during that time window, your reservation will automatically be cancelled. You will receive an Alert email letting you know that your reservation was cancelled.

Need Help?
Email 25Live@montclair.edu for assistance.
Cancel Your Request
If you need to make a change to your existing reservation, you will need to cancel it and create a new one. To cancel, scan or click the QR Code below and enter your Event Reference Number.
