Captioning technologies can be helpful for everyone to ensure clear communication in the classroom. Caption text is powered by machine learning. It depends on audio input from the speaker, including the speaker’s accent, voice modulation, and intonation. As a result, captions might not be a complete and accurate transcription of the speaker’s words.
Panopto Captions
Panopto is an all-in-one video platform. It not only provides desktop lecture recording and automatic captioning services, It is also seamlessly integrated with Canvas. Panopto allows users to add ASR (Automatic Speech Recognition) Captions into videos they have Creator access to. Note that machine-generated captions clearly aren’t the same as human transcription, so they need to be revised and edited to ensure they are 100% accurate.
Many of the online programs that ITDS works with have Panopto videos embedded throughout the course that exist in an external folder. To edit the captioning of these videos, or any video that you may have already directly embedded into a page, follow the steps below.
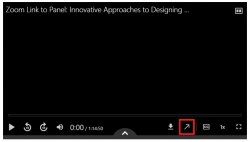
Locate the video within your course.
Once there, click on the ↗, highlighted below, to open the video within Panopto.
Within the Panopto Viewer, follow the instructions below on how to create and edit captions on a video.
How to Create and Edit Panopto Captions
Automatic captions can be added to a video after it is recorded and published.
To create automatic captions:
For a video recorded within your course, head over to the Panopto Video Library and select My Folder. (For videos already embedded within a page or hosted by ITDS, please see the instructions above.)
Hover over the video and click Settings.
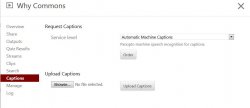
Select Captions.
Make sure Automatic Machine Captions is selected.
Click Order.
A window will open with information regarding the order details.
Close the window.
Once this process has finished, the captions will be accessible.
To View or Edit the Captions:
Hover over the Video in the Panopto Library and select Edit.
Click on the Captions tab.
Captions that are auto generated need to be edited and reviewed carefully.
To edit a captions text or start time:
Play the video in the timeline.
Go to the caption you would like to edit.
Click the More icon to the left of the time stamp.
Select Edit.
Edit the caption as needed.
Click Save.
Repeat the process until all captions are corrected.
To delete a caption:
Click the More icon to the left of the time stamp.
Click Delete.
To add a caption:
Click on the timeline where you would like the caption to begin.
Click where is says Enter a Caption (beneath your current captions).
Google Slides allows users to present slides with captions. When you present slides, you can turn on automatic captions to display the speaker’s words in real-time.
How to Use Google Slides Captions
Google Slides – Present with Captions
When using the Chrome browser, Google Slides allows presenters to turn on automatic captions to display a speaker’s words in real-time. Using your device’s microphone or an external microphone, you can use automatic closed captions that will populate and allow you to adjust the sizing and position.
Step 1: Set up your microphone
To use captions with Google Slides, your computer microphone needs to be on.
Google Slides uses the computer’s microphone or an external microphone.
Step 2: Present with captions
Connect to the Internet.
Open your presentation in Google Slides. If you don’t have content slides, consider using a blank Google Slide to generate your audio input to transcriptions
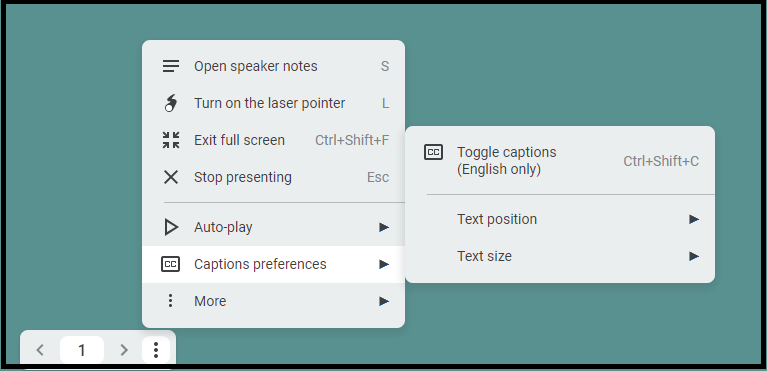
To start presenting, click Present
At the bottom left of the Present screen, click More options – Captions preferences and then Toggle captions
To change the location of the captions, click Text position. it is suggested you choose Top.
To change the size of the caption text, click Text Size.
As you speak, captions appear at the bottom or top of the screen.
To turn off captions, click More options at the bottom left of the Present screen, Captions preferences and then Toggle captions.
Notes on captions
Captions are not stored
Captions don’t include punctuation.
Captions and your microphone automatically turn off if there’s no activity on your computer for 30 minutes.
Zoom Live Captions
Zoom is the official video/web conferencing tool across campus and is integrated into all Canvas courses. You can enable live transcription in your Zoom meetings. This provides participants the option of viewing the machine-generated live captions during the meeting.
How to Use Zoom Live Captions
To enable Zoom’s Live Captions
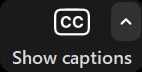
Step 1: From within a Zoom meeting, click the Show captions icon on the HOST’s toolbar.
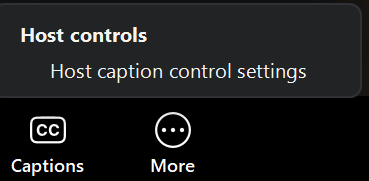
Note: The Host controls will appear if the closed-captions have been disabled for the meeting. To enable the closed captioning, click Host caption control settings then enable the Allow closed captioning for this meeting option. Repeat Step 1.
Step 2: Select the up arrow on the right of the closed-caption icon to access Caption options.
Click View Full Transcript to view the meeting transcript.
Click Caption settings to change the size of the caption text.
Click and drag the caption box to change the location of the displayed text.
Otter.ai
Otter.ai allows users to generate rich notes for meetings, interviews, lectures, and other important voice conversations. This is not supported through MSU.