
Montclair State University uses Banner Workflow to automate, simplify, and direct the flow of information to track approvals, send communications, and update Banner automatically. The Office of the Registrar has implemented the following Workflows:
- Grade Change Workflow
- Class Cancellation Workflow
- Undergraduate Independent Study Workflow
- Undergraduate Repeat Course Workflow
- Undergraduate Change of Major Workflow
- Leave of Absence and Withdrawal Workflow
- Credit Adjustment Workflow
1. Access and login to your NEST account by using your NetID and password.
2. Navigate to the Grades Page and click on “Workflow Worklist.”
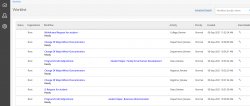
3. Once on the Banner Workflow Webpage-Landing page, your list of approval WORKLIST should look like this.

** PLEASE DO NOT CLICK on Workflows under your work list UNLESS YOU ARE READY TO TAKE AN ACTION. Once you have clicked on one the workflows, it will get assigned to you as the “sole” approver and ONLY YOU will be able to REVIEW/APPROVE/DENY** All other designee’s part of the role in the queue will not be able to access that workflow any longer.
4. The workflow worklist is a list of all workflows that a user has access to through the roles they are assigned. The list can be large so the search functionality is useful in filtering down the list of workflows.
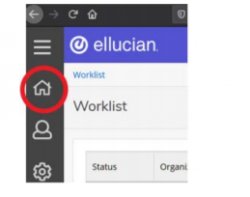
- Click on the home icon
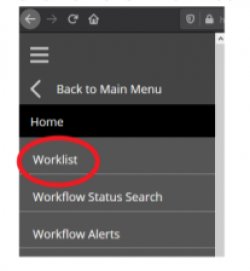
- Click on the “Work List” link/option.
- A list of all pending review workflows assigned to you for the given role will display. Depending on your role, you may have different type of workflows assigned to you for review and approval for example:
- Advisor
- Chair
- Dean
- Provost
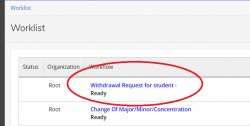
5. The Workflow Work List view will have headers that contain information regarding these workflows. For example:
6. Once you are ready to review a workflow (approve or deny). Click on the workflow link.
Reminder: Please do not click on the workflows if you are not ready to perform an action.
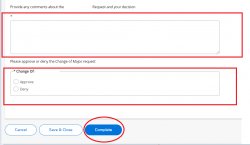
7. For most of the workflows under your queue, you will have the option to add a comment about your decision as well as have the option to approve or deny.
8. The most important step is to click on “COMPLETE” once you have decided so the workflow can be completed and move on to the next level of approval and/or processing automatically in Banner or to be sent to the Office of the Registrar for processing.
We’ve compiled some step-by-step guides to help students and faculty/staff navigate NEST, Self-Service Banner and other processes. For more information on how to approve specific workflows such as
- Grade Change Request (Graduate and Undergraduate)
- Class Cancellation Workflow (this takes place through CLSS)
- Independent Study Approval (NEST) (For undergraduate independent studies)
- Repeat Course Approval (NEST) (For undergraduate repeat requests)
- Undergraduate Change of Major Workflow
- Leave of Absence/Withdrawal Request – Workflow Approval Process
- Program/Credit Adjustment Workflow (Undergraduate)