
If you are unable to complete the setup after using the directions below, please contact the IT Service Desk or your local academic technology team for support.
Note: If you use the Thunderbird email client, please see the special instructions attached to ensure that Thunderbird will be able to connect to your Google account properly after you have enabled 2-Step Verification.
Instructions For Configuring Google 2-Step Verification
You can enable Google 2-Step Verification on your account as follows. Note that you will need an iPhone or Android phone with either the Gmail app, YouTube, or Google app installed in order to use the 2-Step Verification “yes/no” push feature (known as Google prompts).
For more detailed instructions, please see Google’s online documentation on how to turn 2-Step Verification.
- Log into your MSU Google account from a web browser and click on either the “waffle” menu (the 9-dot square icon near the top right corner of your browser) and select “Account“, or click on the circle account icon in the top right corner and select “Manage your Google Account”.
- Once you are at the Account page, click “Security” from the left hand menu.
- On the Security page, in the “Signing in to Google” section, click on “2-Step Verification“, then click “Get Started“.
- For security purposes you will need to re-login to your Google account.
- If you’ve already been using your iOS or Android smartphone with your Montclair Google account (i.e. to use the Gmail, Calendar, or YouTube apps on your phone) then it’s already paired for usage as a 2nd factor of authentication and should show up as a device that is able to receive 2-Step Google prompts. If your phone is NOT listed, click on the “Don’t see your device” link for instructions on how to download the Google app or Gmail app to your phone.
Note: You can elect to use a different method to authenticate with 2-Step Verification such as a call to a landline phone, but we strongly recommend using the smartphone Google prompt method as your primary and use the landline as a backup method.
- Once your smartphone is recognized as a device that can receive prompts, click on “Continue“.
- After you have completed the above steps and added 2-Step Verification to your Google account you will have the option to add another smart phone or landline phone as a backup to receive voice or text messages. You can also download one-time use emergency codes in the rare event that you don’t have your smartphone, don’t have a signal to receive the “push” notifications, or are not near your backup landline phone.
- Now that Google 2-Step Verification is enabled, you may occasionally be prompted for a 2nd factor of authentication when logging into your Google account. When this happens, after entering your NetID and password as usual, you will see a page that asks you to open the Gmail, YouTube, or Google application on your smartphone. Opening any of those apps on your phone will bring up a 2-Step verification prompt where you can select “yes” to proceed with login.
Special Instructions for the Thunderbird Email Client
To ensure that the Thunderbird email application is able to properly connect to your Gmail account after you have enabled Google 2-Step Authentication, make sure that both the Server Settings and Outgoing Server (SMTP) settings are using “OAuth2” as the Authentication method, as shown below.
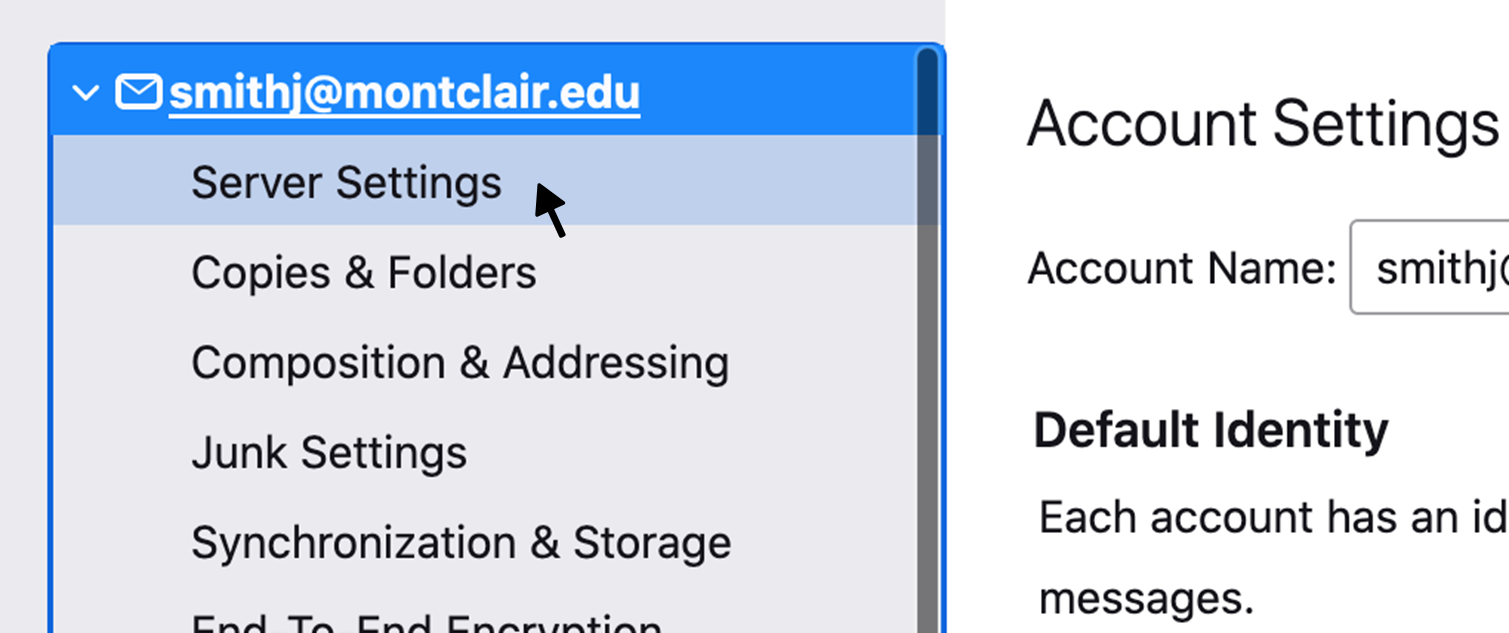
- Under the “Tools” menu, select “Account Settings”, then click on “Server Settings” from the left hand menu:
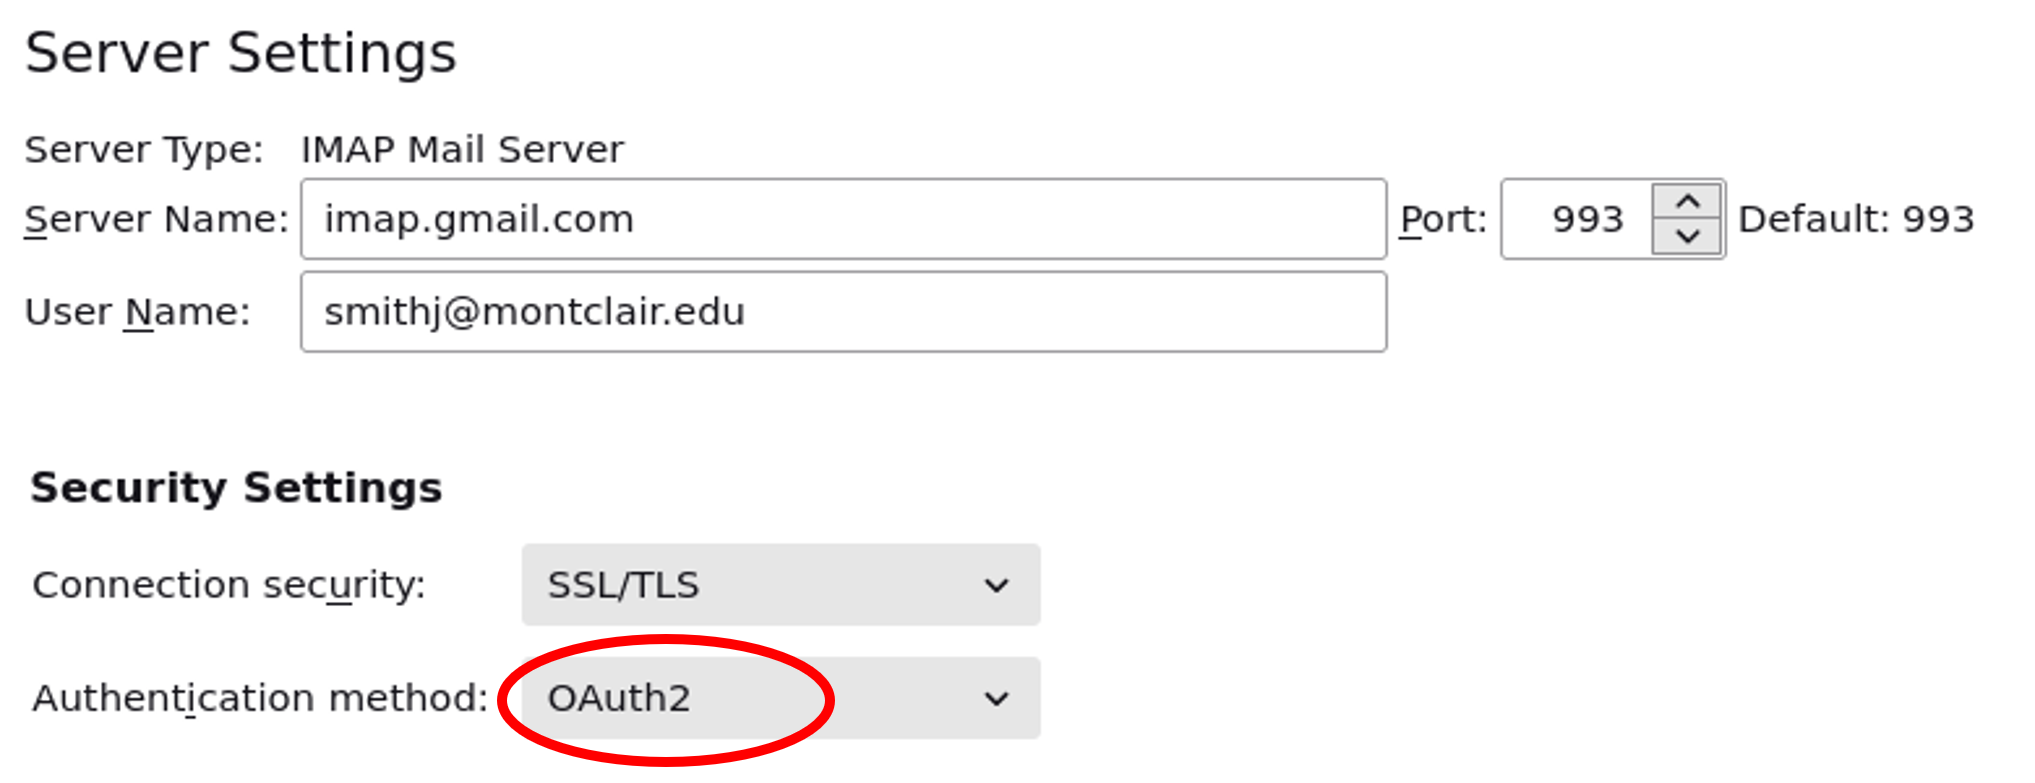
- Make sure that “Connection security” is set to SSL/TLS and “Authentication method” is set to OAuth2.
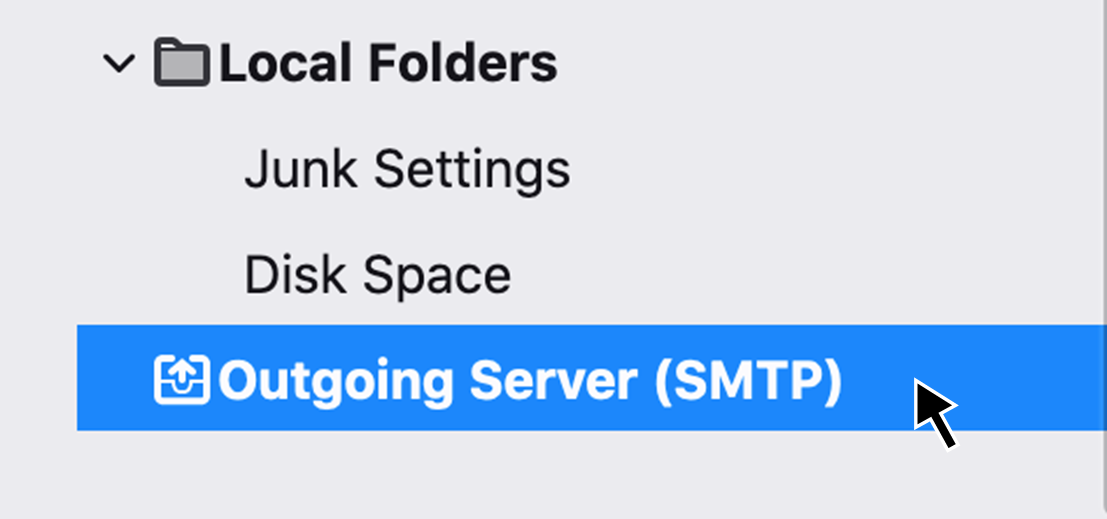
- Next, click “Outgoing Server (SMTP)” at the bottom of the left-hand menu.
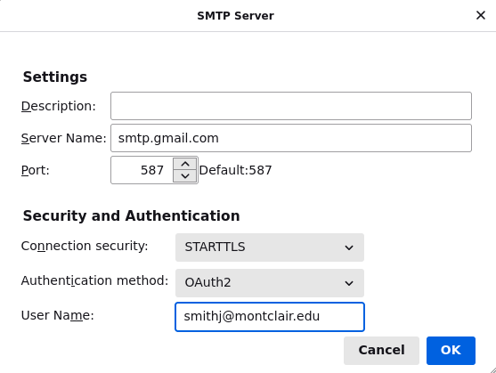
- In the SMTP Server settings, make sure that “Connection security” is set to STARTTLS and “Authentication method” is set to OAuth2.
Frequently Asked Questions
This depends on several factors, but in general if you select to “trust this device” when initially signing into your laptop or desktop with 2-Step Verification, then you will not be prompted for a 2nd factor again for 30 days. After 30 days you will be required to re-authenticate to a trusted device and answer the 2-Step Verification prompt. Currently, this time period cannot be edited – it is set by Google.