Softphone Installation & Setup Guide (Microsoft Windows)
The softphone solution is located in Software Center on your University laptop. Type ‘avaya’ into the search bar to find the software. For detailed instructions on how to download and install software, visit the following link on our Information Technology portal: Software Center
Please note:
In order to use the Softphone solution, you must be logged in to the Montclair State University VPN. You must also have received important information from Telecom which will be sent once you have filled out the online activation form and selected ‘Softphone’.
Installation
The ServiceDesk is able to install this software on your device. If you prefer to install the software on your own, please follow the directions below.
Step 1:
Search for ‘avaya’ in Software Center and download the application to your laptop.

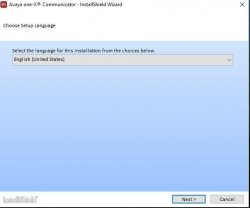
Step 2:
Choose “English (United States)” and click Next, then click Next in the following window
Step 3:
Select “I accept…:, then click Next

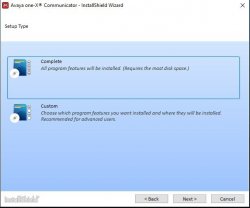
Step 4:
Select ‘Custom’, then click Next.
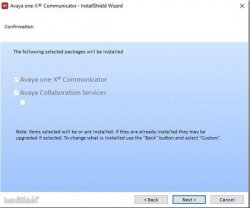
Step 5:
Deselect ‘Avaya Collaboration Service, and select ONLY ‘Avaya one-X Communicator’, then click Next.
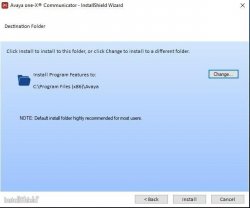
Step 6:
Click on Install
Step 7:
Once the installation has completed, please click on Finish. You will now have an Avaya one-X icon on your desktop.
Advanced Setup and Configuration
**The Telecom department, along with the DIT ServiceDesk can work with you on these advanced settings.**
Step 1:
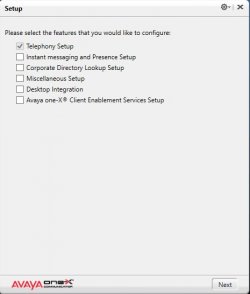
Double click the Avaya one-X icon on your desktop, and then select “Telephony Setup”.
Click Next.
Step 2:
Select ‘H.323’ under Telephony Setup. Please make sure that SIP is not selected.
Click Next.

Step 3:
Enter the following information:
Extension: //this will be your University extension//
Password: The password will be sent to you once the online activation form has been filled out and softphone has been selected. If you have not received the password, please send an email to itservicedesk@montclair.edu, attention: Telecom to receive your password.
Server list: Click Add, and enter 172.19.0.17 for the server address
Click on OK.

Step 4:
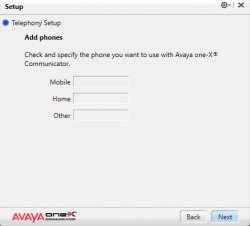
Leave all options blank and click Next
Step 5:
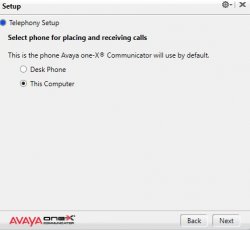
Select ‘This Computer’ and then click Next
Step 6:
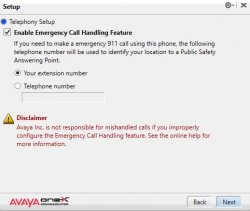
Please make sure that “Enable Emergency Call Handling Feature” and “Your extension number” are selected.
If these options are not selected, please make sure you select these items.
Step 7:
Click on Next, and then click on Finish in the next window.
Click on following window.
The software will shutdown at this point to save the configurations.
Double click the ‘Avaya one-X Communicator’ icon to restart the software.
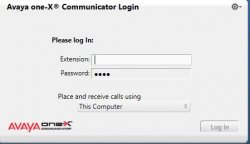
Step 8:
If you have not already entered your University extension, please enter the following:
Extension: your 4-digit University extension
Password: please send an email to itservicedesk@montclair.edu to receive your password.
Please make sure that ‘Place and receive calls using’ shows ‘This Computer’ and then click on the Log In button
**You must be connected to the University VPN to use this application remotely**
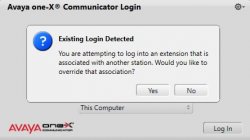
Step 9:
This next window will alert you that you are taking over your physical extension in the office. Click ‘Yes’ on the pop-up window.
Step 10:
Deselect the option for video calling to dismiss the”Video Calling Not Available”
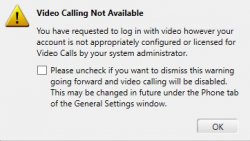
Click on the OK button.
While logged in, click on the Cog/Wheel located on the upper right corner.
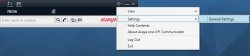
Click on ‘Settings’ and then slide over to select ‘General Settings’ from the menu
Step 11:
In the General Settings window, click on ‘Dialing Rules’ located on the left column under “Devices and Services”
Please change the following parameters:
“Number to dial to access an outside line:” Enter 9
Next to”Number to dial for long distance calls:” please make sure that a 1 is in the field.
The softphone is now ready for use.
Please follow this LINK to access the usage guide for the softphone.
Please reach out to us at itservicedesk@montclair.edu attention Telecom, if you have any issues using your softphone.